

Have you ever looked at a beautifully crafted drink, perhaps a shimmering Moscow Mule, and thought, "Wow, that color would look amazing on my nails?" Well, you are certainly not alone! This very idea has sparked a rather exciting trend in the world of nail art, giving us the absolutely stunning look known as Moscow Mule nails. It's a style that brings together the warmth of copper, the bright pop of lime, and a bit of bubbly sparkle, truly capturing the spirit of that classic cocktail. You know, it’s a design that just feels so fresh and, honestly, quite chic.
This particular nail trend, you see, is all about that distinctive metallic shine and the cool, refreshing vibes of the drink it’s named after. It's not just about painting your nails; it's about making a statement, a little bit like a stylish accessory for your fingertips. People are really taking to this look, especially those who appreciate a blend of modern elegance with a touch of playful charm. It's a way to show off your personality, sort of, without saying a single word.
So, if you are someone who loves to stay on top of the latest beauty fads, or perhaps you just enjoy a truly unique manicure that gets people talking, then Moscow Mule nails might be just what you are looking for. They are surprisingly versatile, too, working for a casual outing or, say, a more dressed-up occasion. We are going to explore everything about this captivating nail art, from what makes it so special to how you can achieve the look yourself, and, you know, some ways to make it truly your own.
Table of Contents
- What Exactly Are Moscow Mule Nails?
- Why All the Buzz About This Look?
- Getting the Look: Your Step-by-Step Guide
- Making It Your Own: Customizing Your Moscow Mule Manicure
- Caring for Your Shimmering Nails
- A Nod to the Namesake: Inspiration from a Grand City
- Frequently Asked Questions About Moscow Mule Nails
- Wrapping Up Your Moscow Mule Nail Journey
What Exactly Are Moscow Mule Nails?
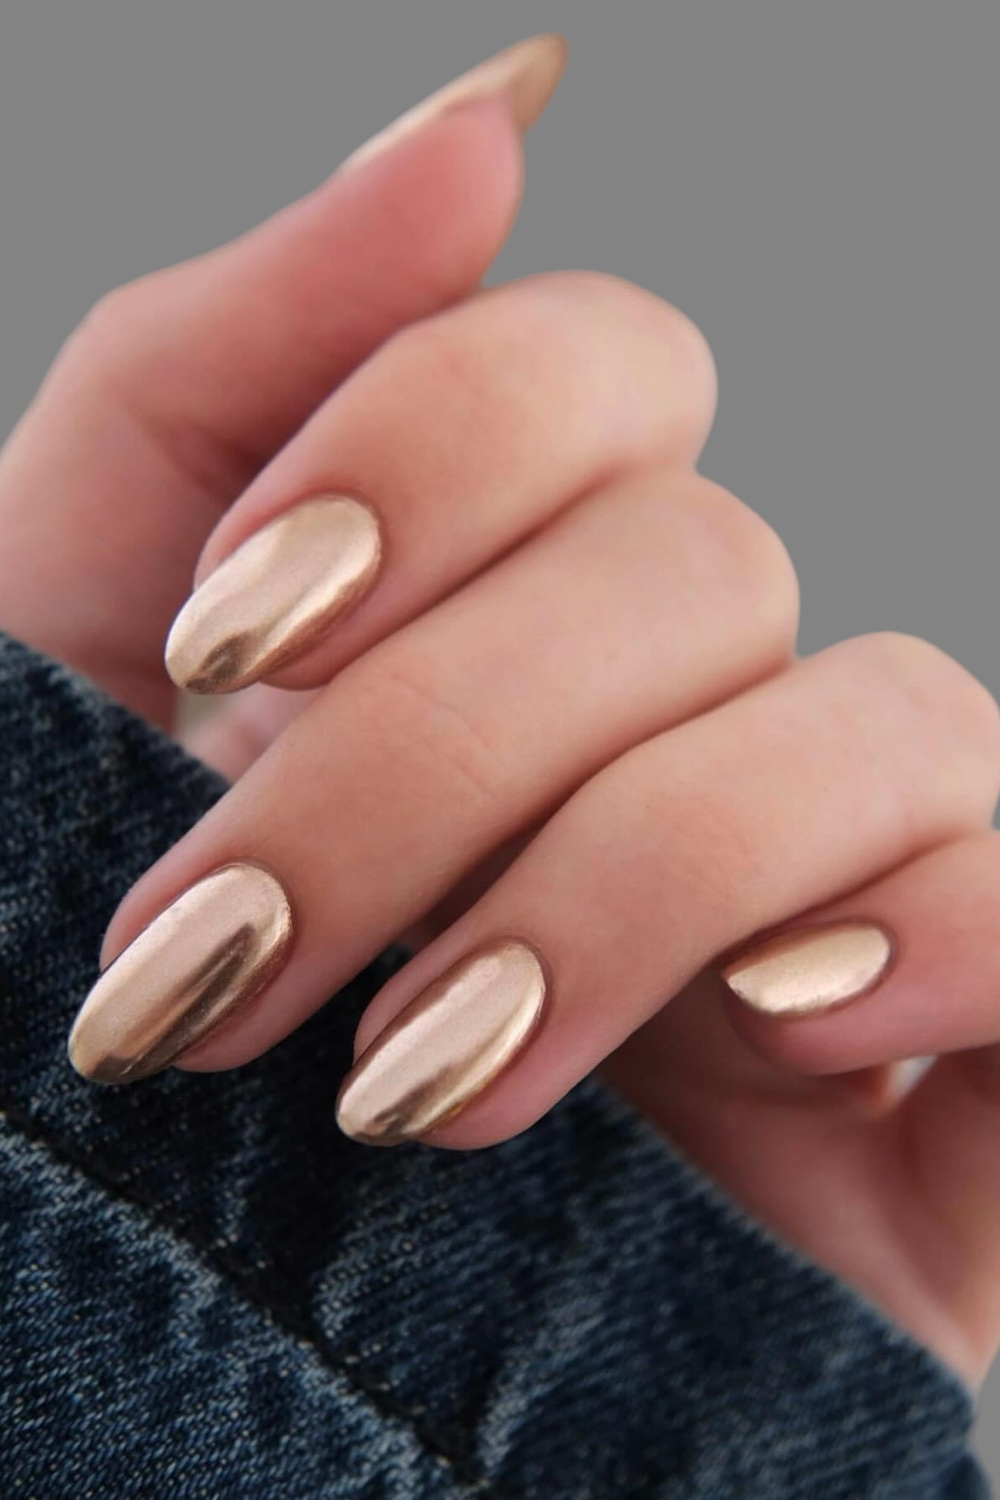
Moscow Mule nails, quite simply, are a nail art style inspired by the popular cocktail, the Moscow Mule. This drink, you know, is famous for its signature copper mug, a bright slice of lime, and those lively ginger beer bubbles. The nail design captures these elements, usually featuring a beautiful metallic copper or rose gold base color. This base, you see, really mimics the iconic mug.
Then, often, there are accents that bring in the fresh green of lime, maybe with a subtle swirl or a small, carefully placed detail. Some versions might even include tiny bubbles or a frosted effect to hint at the fizz of the ginger beer. It’s a very visual interpretation, honestly, of the drink’s key features. The goal is to create a manicure that feels both luxurious and, well, a little bit playful, too.
The core of the look is that warm, inviting metallic shine. It's a shade that, you know, feels quite rich and sophisticated, yet it still has a welcoming quality. It’s a color that really stands out without being overly loud, which is quite a nice balance, you might say. This trend, it appears, is quite popular for those who want something a bit different from the usual solid colors, something that has a bit more character.
Why All the Buzz About This Look?
There are a few good reasons why Moscow Mule nails have really caught on, you know. First off, the metallic finish is incredibly eye-catching. It reflects light in such a lovely way, giving your hands a truly glamorous appearance. This is a look that, honestly, gets noticed, and people often comment on how unique it is.
Secondly, the color palette is surprisingly versatile. Copper and rose gold tones tend to complement many different skin tones, which is a big plus. The addition of green or white accents just adds a bit of freshness, making the whole design feel, well, very balanced. It's a combination that feels both classic and very modern, too.
Also, there's the fun, conversational aspect of it. When someone asks about your nails, you get to share the cool story behind the design, connecting it to a favorite drink. It’s a little bit of a playful nod to cocktail culture, which many people find quite charming. This trend, it seems, is quite appealing because it combines beauty with a touch of cleverness, a bit like a secret handshake for those in the know.
The popularity of this style also has a lot to do with its photogenic quality. These nails, you know, look absolutely fantastic in pictures, especially with natural light. This makes them a favorite for sharing on social media, where trends often spread very quickly. It’s a look that, honestly, just pops on screen, making it a natural fit for our visually driven world.
Getting the Look: Your Step-by-Step Guide
Achieving the Moscow Mule nail look at home is, you know, quite doable with a little patience and the right supplies. You don't need to be a professional nail artist to get a really nice result. It's all about layering and, honestly, paying attention to the details.
Materials You'll Need
- Nail file and buffer
- Cuticle pusher and nippers (optional)
- Base coat
- Metallic copper or rose gold nail polish (this is the key!)
- Green nail polish (for lime accents)
- White nail polish (for fizz or subtle details)
- Thin nail art brush or dotting tool
- Top coat (for shine and protection)
- Nail polish remover and cotton swabs (for clean-up)
The Process, Step by Step
First things first, you want to get your nails ready. Start by shaping them with a nail file to your desired length and shape. Then, gently buff the surface of your nails to create a smooth canvas. This step, you know, is pretty important for a nice, even application. Push back your cuticles, too, for a cleaner look.
Next, apply a thin layer of base coat to all your nails. This helps protect your natural nails and also helps the polish stick better, making your manicure last longer. Let it dry completely; this is, honestly, a very crucial step.
Now, for the star of the show: the metallic copper or rose gold polish. Apply two thin coats of this color, allowing each coat to dry fully before applying the next. Thin coats are better than one thick one, as they dry more evenly and, you know, prevent bubbling. You want that rich, even metallic gleam.
Once your base color is completely dry, it's time for the accents. Dip your thin nail art brush into the green polish. You can paint a small lime wedge shape on one or two accent nails, perhaps near the cuticle or tip. Or, you could just do a small, delicate dot or swirl for a more abstract hint of green. Some people, too, like to do a very fine green line along the edge of the nail.
For the "fizz" effect, if you want it, use a dotting tool or the very tip of your nail art brush with white polish. Create tiny, random dots on some of your nails, especially near the green accent, to mimic bubbles. This step, you know, adds a playful touch and really completes the cocktail vibe. Don't overdo it, though; a little goes a long way.
Finally, once all your designs are dry, apply a generous layer of clear top coat. This will seal in your design, give your nails an amazing shine, and help prevent chips. It also, you know, makes the colors look even more vibrant. Allow plenty of time for this final layer to dry thoroughly.
Clean up any stray polish around your cuticles with a cotton swab dipped in nail polish remover. This step, you see, really makes your manicure look professional and polished. And there you have it, your very own Moscow Mule nails, ready to impress!
Making It Your Own: Customizing Your Moscow Mule Manicure
While the classic Moscow Mule nail look is truly beautiful, there are so many ways to personalize it and make it uniquely yours, you know. You don't have to stick to just one design; you can mix things up a bit. For instance, instead of just a solid copper base, you could try a gradient effect, blending a lighter rose gold into a deeper copper shade. This adds, honestly, a bit more depth.
Consider different types of green accents. Instead of a solid lime wedge, perhaps a glittery green polish for a bit of sparkle, or a more subtle, translucent green for a watery effect. You could also experiment with placement; maybe a green French tip, or a single green stripe down the center of the nail. It's about, you know, playing around with what feels right for you.
Another idea is to incorporate textures. A matte top coat over the copper base could create a very interesting, almost brushed metal look, while keeping the accents glossy. Or, you might add a touch of very fine copper glitter to some nails for extra shimmer. These little details, you see, can really change the whole feel of the manicure.
You could also vary the design on each nail. Maybe one nail has the full lime and fizz, another is just solid copper, and a third has a simple green stripe. This creates a more dynamic and, honestly, visually interesting set of nails. It’s a way to keep things fresh and, well,
:max_bytes(150000):strip_icc()/Snapinsta.app_459628267_356608834087142_6667329878932485607_n_1080-a059d9dbfe0246c1a1e9a1e596813838.jpg)
:max_bytes(150000):strip_icc()/chromenails-252426f20a0b48baa99b4acd4c3e5d49.png)
Detail Author:
- Name : Adelia Luettgen
- Username : savanah.goyette
- Email : aufderhar.coy@yahoo.com
- Birthdate : 1975-10-28
- Address : 36803 Dicki Ford Suite 858 Tatyanaside, KY 48221-1089
- Phone : (817) 783-4821
- Company : Bechtelar, Wyman and Runte
- Job : Engineer
- Bio : Enim soluta cum et ducimus. Qui nostrum in autem pariatur dolorem quo. Doloribus eligendi iure qui molestiae.
Socials
twitter:
- url : https://twitter.com/uriahyost
- username : uriahyost
- bio : Aut fugit animi ab dicta fugit. Voluptate occaecati nam aut esse amet.
- followers : 2503
- following : 749
facebook:
- url : https://facebook.com/uriah.yost
- username : uriah.yost
- bio : Sunt accusamus vero inventore ut inventore voluptas qui.
- followers : 2818
- following : 490
linkedin:
- url : https://linkedin.com/in/uriahyost
- username : uriahyost
- bio : Qui ipsam qui voluptates quisquam aut quia.
- followers : 4342
- following : 1305


 Bonus
Bonus