

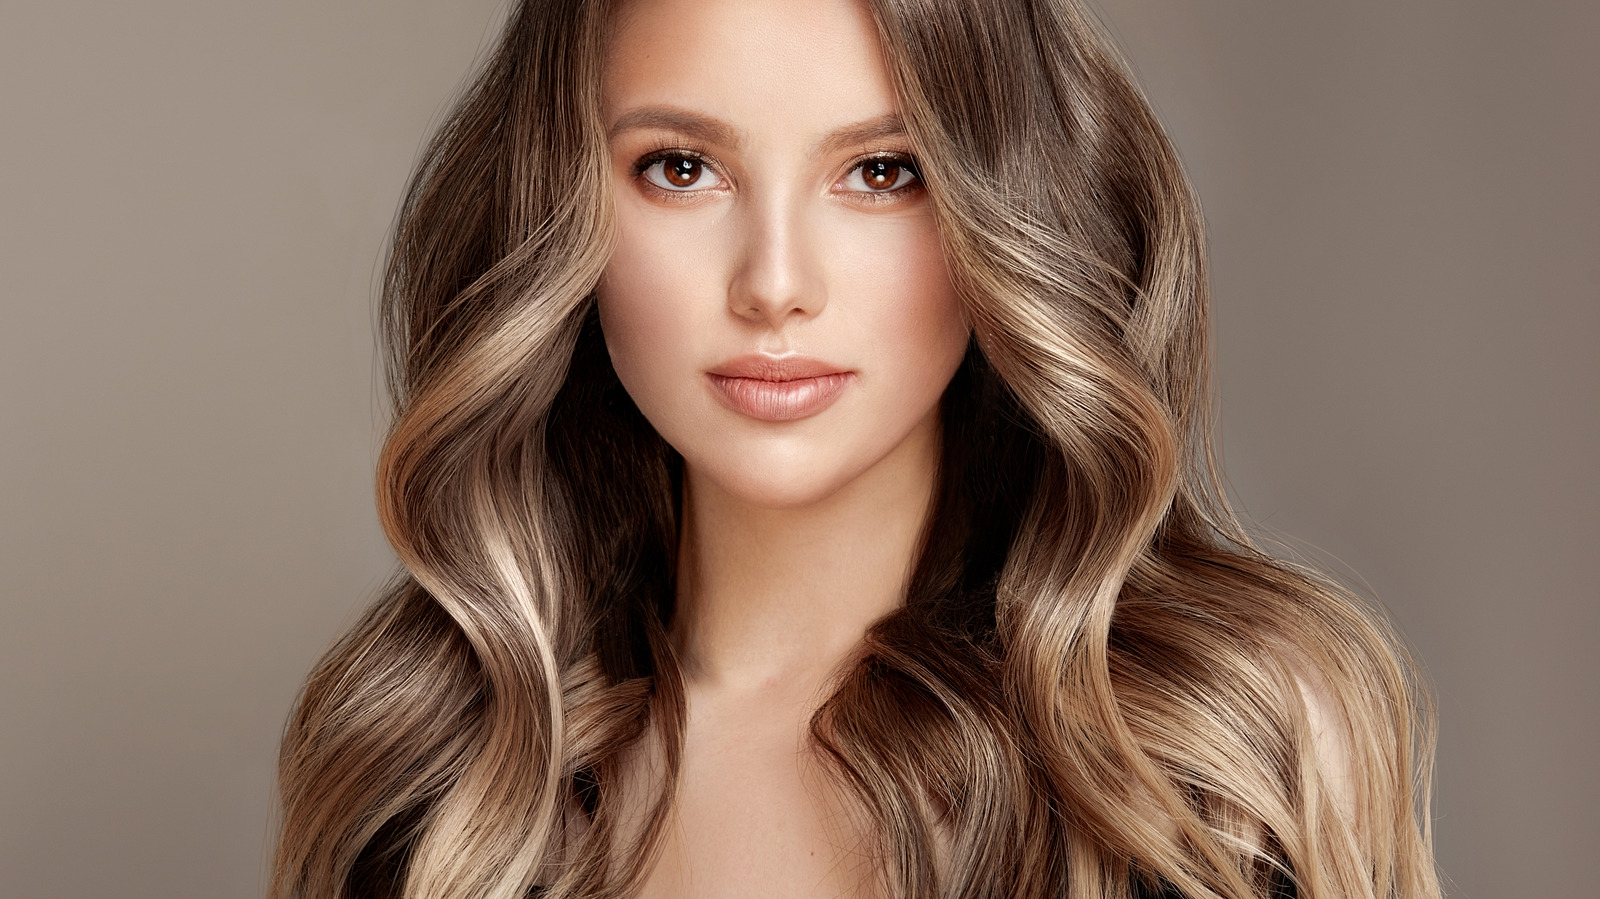
Discovering how to curl hair with a straightener can truly open up new possibilities for your look, giving you lovely waves or bouncy curls without needing a separate tool. It’s a pretty neat trick, actually, and many folks find it incredibly handy for getting a fresh style. You might already have a straightener at home, so learning this technique means you don't have to buy extra gadgets for your hair. It's a smart way to get different looks with what you already own, which is quite appealing.
For many, the idea of using a straightener for curls seems a bit backwards, doesn't it? After all, it's made for making hair straight. Yet, with just a little practice, this versatile item can give you anything from soft, flowing waves to more defined ringlets. It's a skill that once learned, really stays with you, offering a quick style change whenever you feel like it. You know, it's almost like having two tools in one, which is rather convenient.
This guide, put together with a lot of thought and drawing from a variety of helpful resources, including insights from 'My text', aims to give you the simple steps for curling your hair with a straightener. We'll walk you through everything, from getting your hair ready to making those curls last all day. You'll find practical tips, common questions answered, and ways to make sure your hair stays happy and healthy throughout the process. So, let's get started on creating some wonderful curls.
Table of Contents
- Why Curl with a Straightener?
- Getting Ready: What You'll Need
- Preparing Your Hair for Curling
- The Step-by-Step Curling Process
- Finishing Touches: Making Your Curls Last
- Common Questions About Straightener Curls
- Troubleshooting Your Straightener Curls
- Caring for Your Hair: Heat Protection Tips
- Beyond the Basics: Different Curl Styles
- Final Thoughts on Straightener Curling
Why Curl with a Straightener?
Using a straightener for curls is a popular choice for several good reasons. For one, it's incredibly convenient. You might not own a curling iron, or perhaps you're traveling and want to pack light. A straightener can do double duty, which is pretty handy. It means fewer items to carry around, and that's a definite plus for many people, you know.
This method also offers a lot of versatility. You can get a range of curl types, from soft, beachy waves to more bouncy, defined spirals, all with the same tool. It's a bit like having a whole styling kit in one slim device. Learning this skill gives you more options for your daily look, which is actually rather nice.
Also, some people find that straightener curls look more natural or have a softer finish compared to traditional curling irons. It really depends on the technique and your hair type, of course. But many enjoy the more relaxed, effortless feel these curls can give. So, there are quite a few benefits to trying this out, honestly.
Getting Ready: What You'll Need
Before you start, gather a few items. You'll need your straightener, naturally. The size of its plates can affect your curls; smaller plates work well for tighter curls or shorter hair, while wider plates are good for looser waves on longer hair. So, pick the one that feels right for your desired look, or just use what you have.
A good heat protectant spray is absolutely essential. This product creates a shield for your hair, helping to keep it safe from the heat. Don't skip this step, it's really important for healthy hair. You'll also want some hair clips or ties to section your hair. This makes the process much more manageable, you see.
Lastly, have a comb or brush nearby to detangle your hair before curling, and a light-hold hairspray for setting your finished style. A mirror, too, can be quite helpful, especially when you're working on the back sections of your head. Having everything ready beforehand just makes the whole process smoother, more or less.
Preparing Your Hair for Curling
Starting with the right base makes a big difference. Your hair should be clean and completely dry before you even think about using heat on it. Curling wet or damp hair with a straightener can cause serious damage, so always make sure it's bone dry. This step, honestly, is one of the most important for keeping your hair healthy.
Next, apply your heat protectant spray evenly throughout your hair. Make sure every strand gets some coverage, especially the ends. You can gently comb it through to distribute the product well. This protective layer is your hair's best friend when it comes to heat styling, and it's something you really shouldn't skip, just a little heads-up.
Finally, section your hair. This helps you work in smaller, manageable pieces, which makes curling much easier and ensures an even result. You can divide your hair into two or three main sections, then clip up the top layers. Start with the bottom sections first, working your way up. It's a simple step, but it really helps keep things organized, apparently.
The Step-by-Step Curling Process
Now for the fun part! The basic motion involves clamping, rotating, and pulling. Take a small section of hair, about one to two inches wide. The smaller the section, the more defined your curl will be. Place your straightener near the root of that section, but not so close that it touches your scalp, naturally.
Clamp the straightener gently around the hair. Then, here's the key: rotate the straightener about a half turn (180 degrees) away from your face. Keep a firm, but not too tight, grip. Now, slowly and smoothly pull the straightener down the hair shaft, from root to tip. The speed of your pull will also affect the curl; a slower pull generally means a tighter curl. It's a bit like a dance, you know, a very slow one.
As you pull, keep the straightener at that rotated angle. When you reach the end of the hair section, gently release the clamp. A beautiful curl should spring out! Let it cool completely before touching it. This cooling time is pretty important for the curl to set. You'll repeat this process for all your hair, working section by section. It takes a little practice, but you'll get the hang of it, really.
For Loose Waves
If you're aiming for those relaxed, beachy waves, there are a few adjustments you can make. When you clamp the straightener, don't rotate it a full 180 degrees. Try more like a quarter turn, or even less, perhaps just a slight bend. This gives a softer, less defined curve to the hair. It's a subtle difference, but it really changes the look, you see.
Also, try pulling the straightener through your hair a bit faster. A quicker pull results in a looser wave, as the heat has less time to set a tight curl. You can also take slightly larger sections of hair, say two to three inches wide, for an even more relaxed look. This technique is often favored for a more casual, undone style, which is quite popular, actually.
Another trick for loose waves is to start the rotation lower down the hair shaft, maybe a few inches from the root, rather than right at the top. This leaves the top part of your hair straighter and gives a more natural, flowing look. It's a little different, but still simple to do once you get the feel for it, more or less.
For Tighter Curls
To get more defined, tighter curls, you'll want to use smaller sections of hair, ideally about one inch wide or even less. The smaller the section, the more heat and rotation it receives, leading to a tighter spiral. This is a pretty key point for achieving that look, you know.
When you rotate the straightener, make sure it's a full 180-degree turn, or even a bit more if your straightener allows. Keep that rotation consistent as you pull the tool down the hair shaft. And here's another important tip: pull the straightener very slowly. The slower you go, the more time the heat has to shape the hair into a tight curl. This really helps to set the curl firmly, in a way.
You might also find it helpful to hold the straightener vertically as you pull it down for tighter curls. This can encourage the hair to wrap around the plates in a more cylindrical way, giving a more uniform curl. It takes a little more precision, but the results can be really striking, honestly.
Finishing Touches: Making Your Curls Last
Once you've curled all your hair, the very first thing to do is resist the urge to touch them! Let your curls cool down completely before you do anything else. As they cool, they set their shape, and this is a really important step for longevity. If you touch them too soon, they might just fall flat, which is a bit of a bummer.
After your curls are cool, you can gently break them up if you want a softer look. For loose waves, run your fingers through them or use a wide-tooth comb. For tighter curls, you might just gently separate them with your fingers. Don't brush them out too vigorously, or you'll lose the curl definition. You know, it's about being gentle here.
Finally, set your style with a light mist of hairspray. Don't go overboard; a little goes a long way to hold the shape without making your hair stiff. You can also flip your head upside down and spray for extra volume. These small steps really help your beautiful curls last throughout the day, which is what we're aiming for, naturally.
Common Questions About Straightener Curls
Can I curl short hair with a straightener?
Yes, absolutely! Curling short hair with a straightener is totally possible and can look really charming. The trick is to use a straightener with smaller plates, usually one inch or less, as these can get closer to the scalp and maneuver around shorter strands more easily. You'll also want to take smaller sections of hair, perhaps half an inch wide. It's a bit more fiddly, but definitely doable, you know.
For very short hair, you might focus on just the ends or create subtle bends rather than full curls. The technique is the same: clamp, rotate, and pull. Just adjust your section size and the speed of your pull to suit your hair length. It might take a little extra patience, but the results can be super cute. So, don't feel like your hair is too short to try this out, honestly.
What temperature should I use for curling?
Choosing the right temperature is really important for both your curls and your hair's health. For most hair types, a medium heat setting, somewhere between 300°F and 375°F (150°C to 190°C), works well. If your hair is fine, thin, or easily damaged, start on the lower end of that range. You want enough heat to form the curl, but not so much that it causes harm, naturally.
For thicker, coarser, or very resistant hair, you might need to go a bit higher, perhaps up to 400°F (200°C), but never higher than your straightener's maximum recommended temperature. Always do a test curl on a small, hidden section of hair first to see how it responds. If you see steam or smell burning, turn the heat down immediately. It's better to be safe than sorry, you know, when it comes to heat. Over time, you'll figure out what works best for your hair, more or less.
How do I make my straightener curls last longer?
Making your curls last is all about preparation and proper finishing. First, always make sure your hair is completely dry before curling. Any moisture can make curls fall flat quickly. Second, use a good heat protectant that also offers some hold. Some heat protectants have light styling properties that help curls set. This really gives them a good start, you see.
After curling each section, let the curl cool completely in your hand or pinned up before letting it go. This cooling time is pretty crucial for setting the curl's memory. Once all curls are cool, finish with a flexible hold hairspray. Don't use too much, just a light mist. You can also try a

Detail Author:
- Name : Bartholome Walter IV
- Username : fisher.jalyn
- Email : bruen.meghan@grady.info
- Birthdate : 1981-05-29
- Address : 7746 Wisozk Ferry Kuphalport, ND 58016
- Phone : +15598781610
- Company : Goodwin Group
- Job : Shipping and Receiving Clerk
- Bio : Voluptas eveniet non totam quos excepturi sed inventore. Aliquid officiis quibusdam inventore aut est amet quia. Corporis ullam temporibus possimus itaque exercitationem rem.
Socials
facebook:
- url : https://facebook.com/aniya_official
- username : aniya_official
- bio : Iste laborum eaque quae et suscipit consequuntur.
- followers : 6230
- following : 1348
twitter:
- url : https://twitter.com/aniya.miller
- username : aniya.miller
- bio : Omnis consequatur in corrupti ut. Rem rerum nisi repellat ipsa dolorem. Reprehenderit sunt quo ipsum.
- followers : 6850
- following : 1321


 Bonus
Bonus