

Have you ever watched someone effortlessly create a stunning bow with ribbon and wished you could do the same? It's a rather common feeling, you know. A perfectly tied bow can really make a gift feel special, add a touch of charm to a craft project, or even just brighten up a hair accessory. It's that little detail that just seems to say, "I put thought into this," and honestly, it's not nearly as tricky as it might look. So, you're in the right place to figure this out.
Learning how to tie a bow with ribbon is, in a way, a bit like learning any other knot. You want something that holds well, looks neat, and, well, stays put. Just as you might practice different ways to tie a necktie, like a Windsor or a Four-in-Hand, getting good at ribbon bows takes a little bit of trying it out. It's about getting the feel for the material and understanding the basic movements.
This guide will walk you through the simple steps to achieve a lovely bow, whether it's for a present, a decoration, or something else entirely. We'll explore the classic method and some helpful hints to make your bows look absolutely wonderful. It's honestly quite satisfying when you get it right, and you'll find yourself wanting to put bows on just about everything.
Table of Contents
- Why a Beautiful Bow Makes All the Difference
- Getting Ready: What You'll Need
- The Classic Bow: A Step-by-Step Guide
- Mastering the Double Loop Bow
- Tips for a Truly Perfect Bow
- Common Bow-Tying Questions Answered
- Beyond the Basics: Other Bow Ideas
Why a Beautiful Bow Makes All the Difference
A bow, you know, is more than just a piece of ribbon tied up. It's a sign of care, a little bit of flair, and it really does finish off whatever you're working on. Think about a birthday present wrapped so nicely, or a homemade wreath on a door. That perfect bow just adds a certain something, doesn't it? It can turn something ordinary into something quite special, and that's a big part of its appeal.
For gift-giving, a well-made bow shows that you've put thought into the presentation, not just the gift itself. It's like the cherry on top of a delicious cake. For crafts, it can pull together different elements, adding texture and color. And for personal style, like in your hair, a bow can be a fun way to express yourself, too. It's a rather versatile little embellishment, actually.
So, learning this skill means you're adding a handy tool to your creative kit. It’s a simple thing that can make a big impact, and that, in some respects, is why it matters so much to people.
Getting Ready: What You'll Need
Before you even think about making your first loop, it's good to have everything ready. This isn't a long list, but having the right things nearby will make the process much smoother, you know. You won't be scrambling for supplies mid-knot.
First, and most importantly, you'll need your ribbon. The type of ribbon you choose can really change the look and feel of your bow. Think about the material – satin, grosgrain, sheer, wired, or even fabric scraps. Each has its own way of behaving, so to speak. Wider ribbons often make bigger, more dramatic bows, while narrower ones are good for delicate touches.
You might also want a good pair of sharp scissors. This is pretty basic, but clean cuts on your ribbon ends make a huge difference in how neat your finished bow looks. Sometimes, too, if you're working with very slippery ribbon, a little bit of tape or a small piece of floral wire might be helpful to hold things in place as you start, but that's more for advanced projects, perhaps.
The Classic Bow: A Step-by-Step Guide
This is the basic bow that most people think of when they hear the word "bow." It's the one you tie on shoelaces, and it's the foundation for many other bow styles. Once you get this down, you'll feel pretty good about your bow-tying abilities, honestly.
Step 1: Start with the Right Length
To begin, you need to cut your ribbon. It’s always better to have a bit too much ribbon than not enough, you know. You can always trim it down later, but you can't add more once it's cut short. A good rule of thumb is to estimate how big you want your loops and tails to be, and then double that length, adding a little extra for the knot itself. For a medium-sized bow, about 24-30 inches of ribbon is a good starting point, but this can vary a lot depending on the ribbon's width and the desired bow size, obviously.
Hold one end of the ribbon in your non-dominant hand. Let the longer part of the ribbon drape down. This is where you’ll start forming your first loop, so get a comfortable grip.
Step 2: Make the First Loop
Now, take the longer end of the ribbon and bring it up to form a loop. This loop should be the size you want one side of your finished bow to be. Make sure the "pretty" side of the ribbon is facing outwards, especially if your ribbon has a distinct front and back. Some ribbons are double-sided, which makes this step a little less fussy, thankfully.
Hold this loop firmly between your thumb and forefinger at the base, where it meets the initial piece of ribbon. This point will be the center of your bow, so keeping it secure is quite important.
Step 3: Create the Second Loop
With the remaining ribbon, bring it around and create a second loop. This loop should be about the same size as your first one. Try to make them as even as possible; this helps a lot with the overall symmetry of your bow. It’s a bit like balancing things out, you know.
Once you have both loops, hold them together at the center point with the same thumb and forefinger. You'll have two loops sticking out, and the two tails of the ribbon hanging down. It should look a bit like bunny ears, honestly.
Step 4: Cross and Pull Through
Now, take one of your loops and cross it over the other loop. This is where the actual knot begins to form. Think of it like making the first step of tying your shoelaces. You're creating an opening, a little hole, right in the middle where the two loops cross.
Next, take the loop that you just crossed over and thread it *under* and *through* that opening you just made. You’re essentially pulling one loop through the center of the other. This action is what binds the ribbon together and starts to form the knot that will hold your bow in place. It's quite a satisfying movement, actually.
Step 5: Tighten and Adjust
Once you've pulled that loop through, gently pull on both loops at the same time. Don't yank too hard at first; you want to slowly tighten the knot. As you pull, the knot will become more defined, and your loops will start to take shape. This is the part where you can really fine-tune the look of your bow.
Adjust the loops and tails until they are even and symmetrical. You can gently tug on individual loops or tails to make them longer or shorter, or to adjust their plumpness. Fluff the loops a bit to give the bow some volume. If you're using wired ribbon, this is where you can really shape the loops to stand out. It's a bit like sculpting, you know.
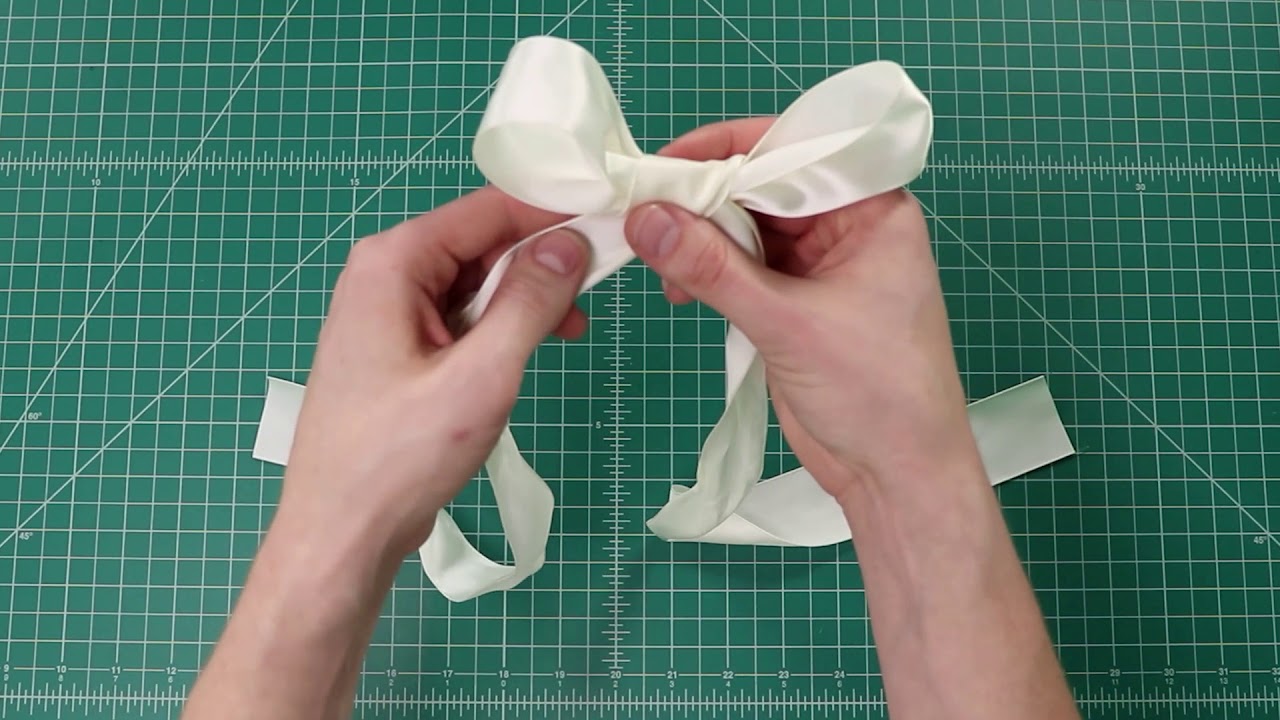
Mastering the Double Loop Bow
Sometimes, you want a bow with a bit more oomph, something fuller and more luxurious. That’s where the double loop bow comes in. It's a slight variation on the classic, but it adds a lot of visual weight and texture. It's honestly quite impressive when done well.
A Slightly Different Start
For a double loop bow, you'll need a longer piece of ribbon, naturally. Instead of making just one loop on each side, you'll be making two. Begin by holding the ribbon as you would for a classic bow. However, when you make your first loop, make it a bit smaller than you want your final outer loop to be.
Then, immediately behind that first loop, create a second loop of the same size. So, you'll have two loops stacked on top of each other, held at the base. This is a bit different from the single loop start, obviously, and sets the stage for a fuller bow.
The Double Wrap Technique
Now, take the remaining ribbon and bring it around to the other side. Here, you'll repeat the process: create two more loops, matching the size of the first pair as closely as possible. You'll now have four loops in total – two on each side – all gathered at the center point. It's starting to look quite substantial, you know.
Once all four loops are formed and held securely, you'll proceed with the crossing and pulling through step, just like with the classic bow. You're essentially tying a knot with four "bunny ears" instead of two. It might feel a little bulkier in your hands, but the principle is the same.
Finishing Strong
As you pull the loop through and gently tighten, you'll see your double bow take shape. This is where the magic happens. You'll need to spend a little more time adjusting each of the four loops and the tails to make sure they are evenly spaced and nicely fluffed. You can gently pull each loop individually to get it just right.
The result is a much richer, more dimensional bow that really stands out. It’s perfect for larger gifts, wreaths, or anything that needs a bit of extra visual impact. It really does add a touch of elegance, in a way.
Tips for a Truly Perfect Bow
Getting a bow just right involves more than just the steps; it also has to do with some general wisdom about working with ribbons. These little hints can make a big difference in your results, you know.
Choosing Your Ribbon Wisely
The type of ribbon you pick is really important. Satin ribbons, for instance, have a beautiful sheen but can be a bit slippery to work with. Grosgrain ribbons, on the other hand, have a ribbed texture that makes them easier to grip and hold their shape well. Wired ribbons are fantastic because you can literally mold the loops and tails into whatever shape you want, and they stay there.
Consider the purpose of your bow when choosing. A delicate sheer ribbon might be lovely for a small gift, while a sturdy wired ribbon is better for outdoor decorations. The width also matters; wider ribbons generally make bigger, bolder bows, while narrow ones are for more subtle touches. It's honestly quite a creative choice, in some respects.
Practice Makes Pretty
Just like learning any new skill, practice is key. The first bow you tie might not be perfect, and that's completely fine. Keep trying! The more you work with different types of ribbons and practice the steps, the more natural it will feel. You'll develop a feel for how much tension to apply and how to adjust the loops with ease.
Don't be afraid to untie and re-tie. Sometimes, you just need to start over to get it right, and that’s okay. The ribbon isn't going anywhere. This really does help build your confidence, you know.
The Mirror Trick
This is a really helpful tip, especially when you're first starting out. As the "My text" from the provided information mentions about tying neckties, "The animations are presented as though the wearer were seeing his own reflection," and "People should practice tying knots in front of a mirror for best results." This idea applies perfectly to tying bows with ribbon, too.
If you're tying a bow on something that's in front of you, like a gift box, standing in front of a mirror can give you a different perspective. It helps you see the bow as someone else would see it, allowing you to spot uneven loops or crooked tails more easily. It's a simple trick, but it really can make a big difference in getting that symmetrical look you want. So, try it out; it might surprise you how much it helps, honestly.
Securing Your Bow
Sometimes, especially if the bow is going to be handled a lot or needs to stay put for a long time, you might want to secure it a bit more. A tiny dab of hot glue on the back of the knot can keep it from unraveling, but be careful not to get it on the visible parts of the ribbon.
For bows on gifts, simply tying the ribbon tightly is usually enough. For hair bows, you might want to attach a clip or a hair tie to the back of the knot using a strong adhesive or by sewing it on. This just makes sure your hard work stays looking good, you know.
Common Bow-Tying Questions Answered
People often have similar questions when they're learning to tie bows. Let's go over a few of the common ones that pop up, because chances are, you might be wondering about these, too.
How do you tie a simple bow with ribbon?
Tying a simple bow with ribbon really comes down to the classic method we just talked about. You start by making two loops, one with each end of the ribbon, sort of like bunny ears. Then, you cross one loop over the other, bring it underneath and through the hole created, and gently pull both loops to tighten. That's pretty much it, honestly. The key is to keep your loops even in size and to adjust them carefully at the end. It's the most basic knot for a bow, and it’s very versatile.
What is the easiest way to tie a bow?
The easiest way for most people to tie a bow is often that classic "bunny ear" method. It’s what we learn for shoelaces, so it feels quite familiar. Some folks find it even easier to wrap the ribbon around their fingers first to create the initial loops before tying the knot. Another really simple trick is to use wired ribbon, because it holds its shape so well, making it very forgiving if your loops aren't perfectly even at first. So, it's almost like the ribbon does some of the work for you, you know.
How do you tie a bow with two loops?
Tying a bow with two loops is exactly what the classic method achieves. Each "bunny ear" you make forms one of the loops. So, when you follow the steps of making a loop with each end of the ribbon, crossing them, and pulling one through, you are, in fact, creating a bow with two distinct loops. If you want a bow with *more* than two loops, that's when you start looking at the double loop method or even more complex bow-making techniques, but the basic two-loop bow is the starting point for all of them, really.
Beyond the Basics: Other Bow Ideas
Once you're comfortable with the classic and double-loop bows, you might want to explore other styles. There are so many ways to tie a bow, each with its own charm. For example, you can create layered bows by using different widths or colors of ribbon, tying them together at the center. This adds a lot of visual interest and depth, you know.
Another popular style is the "florist bow," which involves creating multiple loops from a single continuous piece of ribbon before securing the center. These are often used for wreaths or large gift baskets and can look very full and impressive. There are also simple knots from ties.com and other places that can give you ideas for how to bind, fasten, or attach with a cord, string, or the like, drawn together and knotted, which is the very meaning of a tie, as in "to fasten, attach, or close by means of a tie." So, the principles of knot tying are quite universal, honestly.
You can also play with how you cut the ends of your ribbon tails. A simple diagonal cut, a V-shape, or even a swallowtail cut can add a polished finish. Remember, just like learning different ways to put on a necktie, like the popular Windsor knot or Half Windsor knot, learning more bow styles just adds to your skill set. You can learn more about ribbon crafting on our site, and also explore other decorative knot ideas right here.
The world of bows is quite broad, and there's always something new to try. Don't be afraid to experiment with different ribbons, colors, and techniques. The more you practice, the more confident you'll become, and soon you'll be creating beautiful bows for every occasion. It's a pretty fun skill to have, honestly.


Detail Author:
- Name : Neoma Hudson
- Username : carolyne.cummings
- Email : emmalee.harris@lebsack.com
- Birthdate : 1994-10-17
- Address : 8786 Suzanne Harbor Suite 448 McClureburgh, VT 14265
- Phone : 1-970-463-6639
- Company : Altenwerth-Harber
- Job : Product Safety Engineer
- Bio : Modi repellat rem excepturi sit inventore nesciunt. Incidunt id doloribus fuga corporis eos. Delectus officia expedita eos odit.
Socials
linkedin:
- url : https://linkedin.com/in/emma_real
- username : emma_real
- bio : Perferendis facilis et molestiae quae blanditiis.
- followers : 1503
- following : 2184
twitter:
- url : https://twitter.com/shieldse
- username : shieldse
- bio : Ea iure nemo odio est ipsam. Assumenda omnis quia ea ipsum harum sit. Omnis et maiores sit numquam. Quae minima et qui quidem voluptas magni.
- followers : 4364
- following : 634


 Bonus
Bonus