

Have you ever looked at a vibrant hibiscus bloom and thought, "I wish I could draw something that beautiful?" Well, you are in the right place, you know. Many people feel a pull to create art, and learning how to draw a hibiscus flower can be a truly rewarding experience, it really can. It is a chance to put beauty onto paper, capturing those amazing petals and bright colors, so.
Drawing flowers, and particularly a hibiscus flower drawing, is a fantastic way to practice creating stunning floral designs, and that's a fact. It's a skill that builds confidence, too, allowing you to see progress with each line you make. You might find it quite relaxing, actually, a quiet moment just for you and your art supplies.
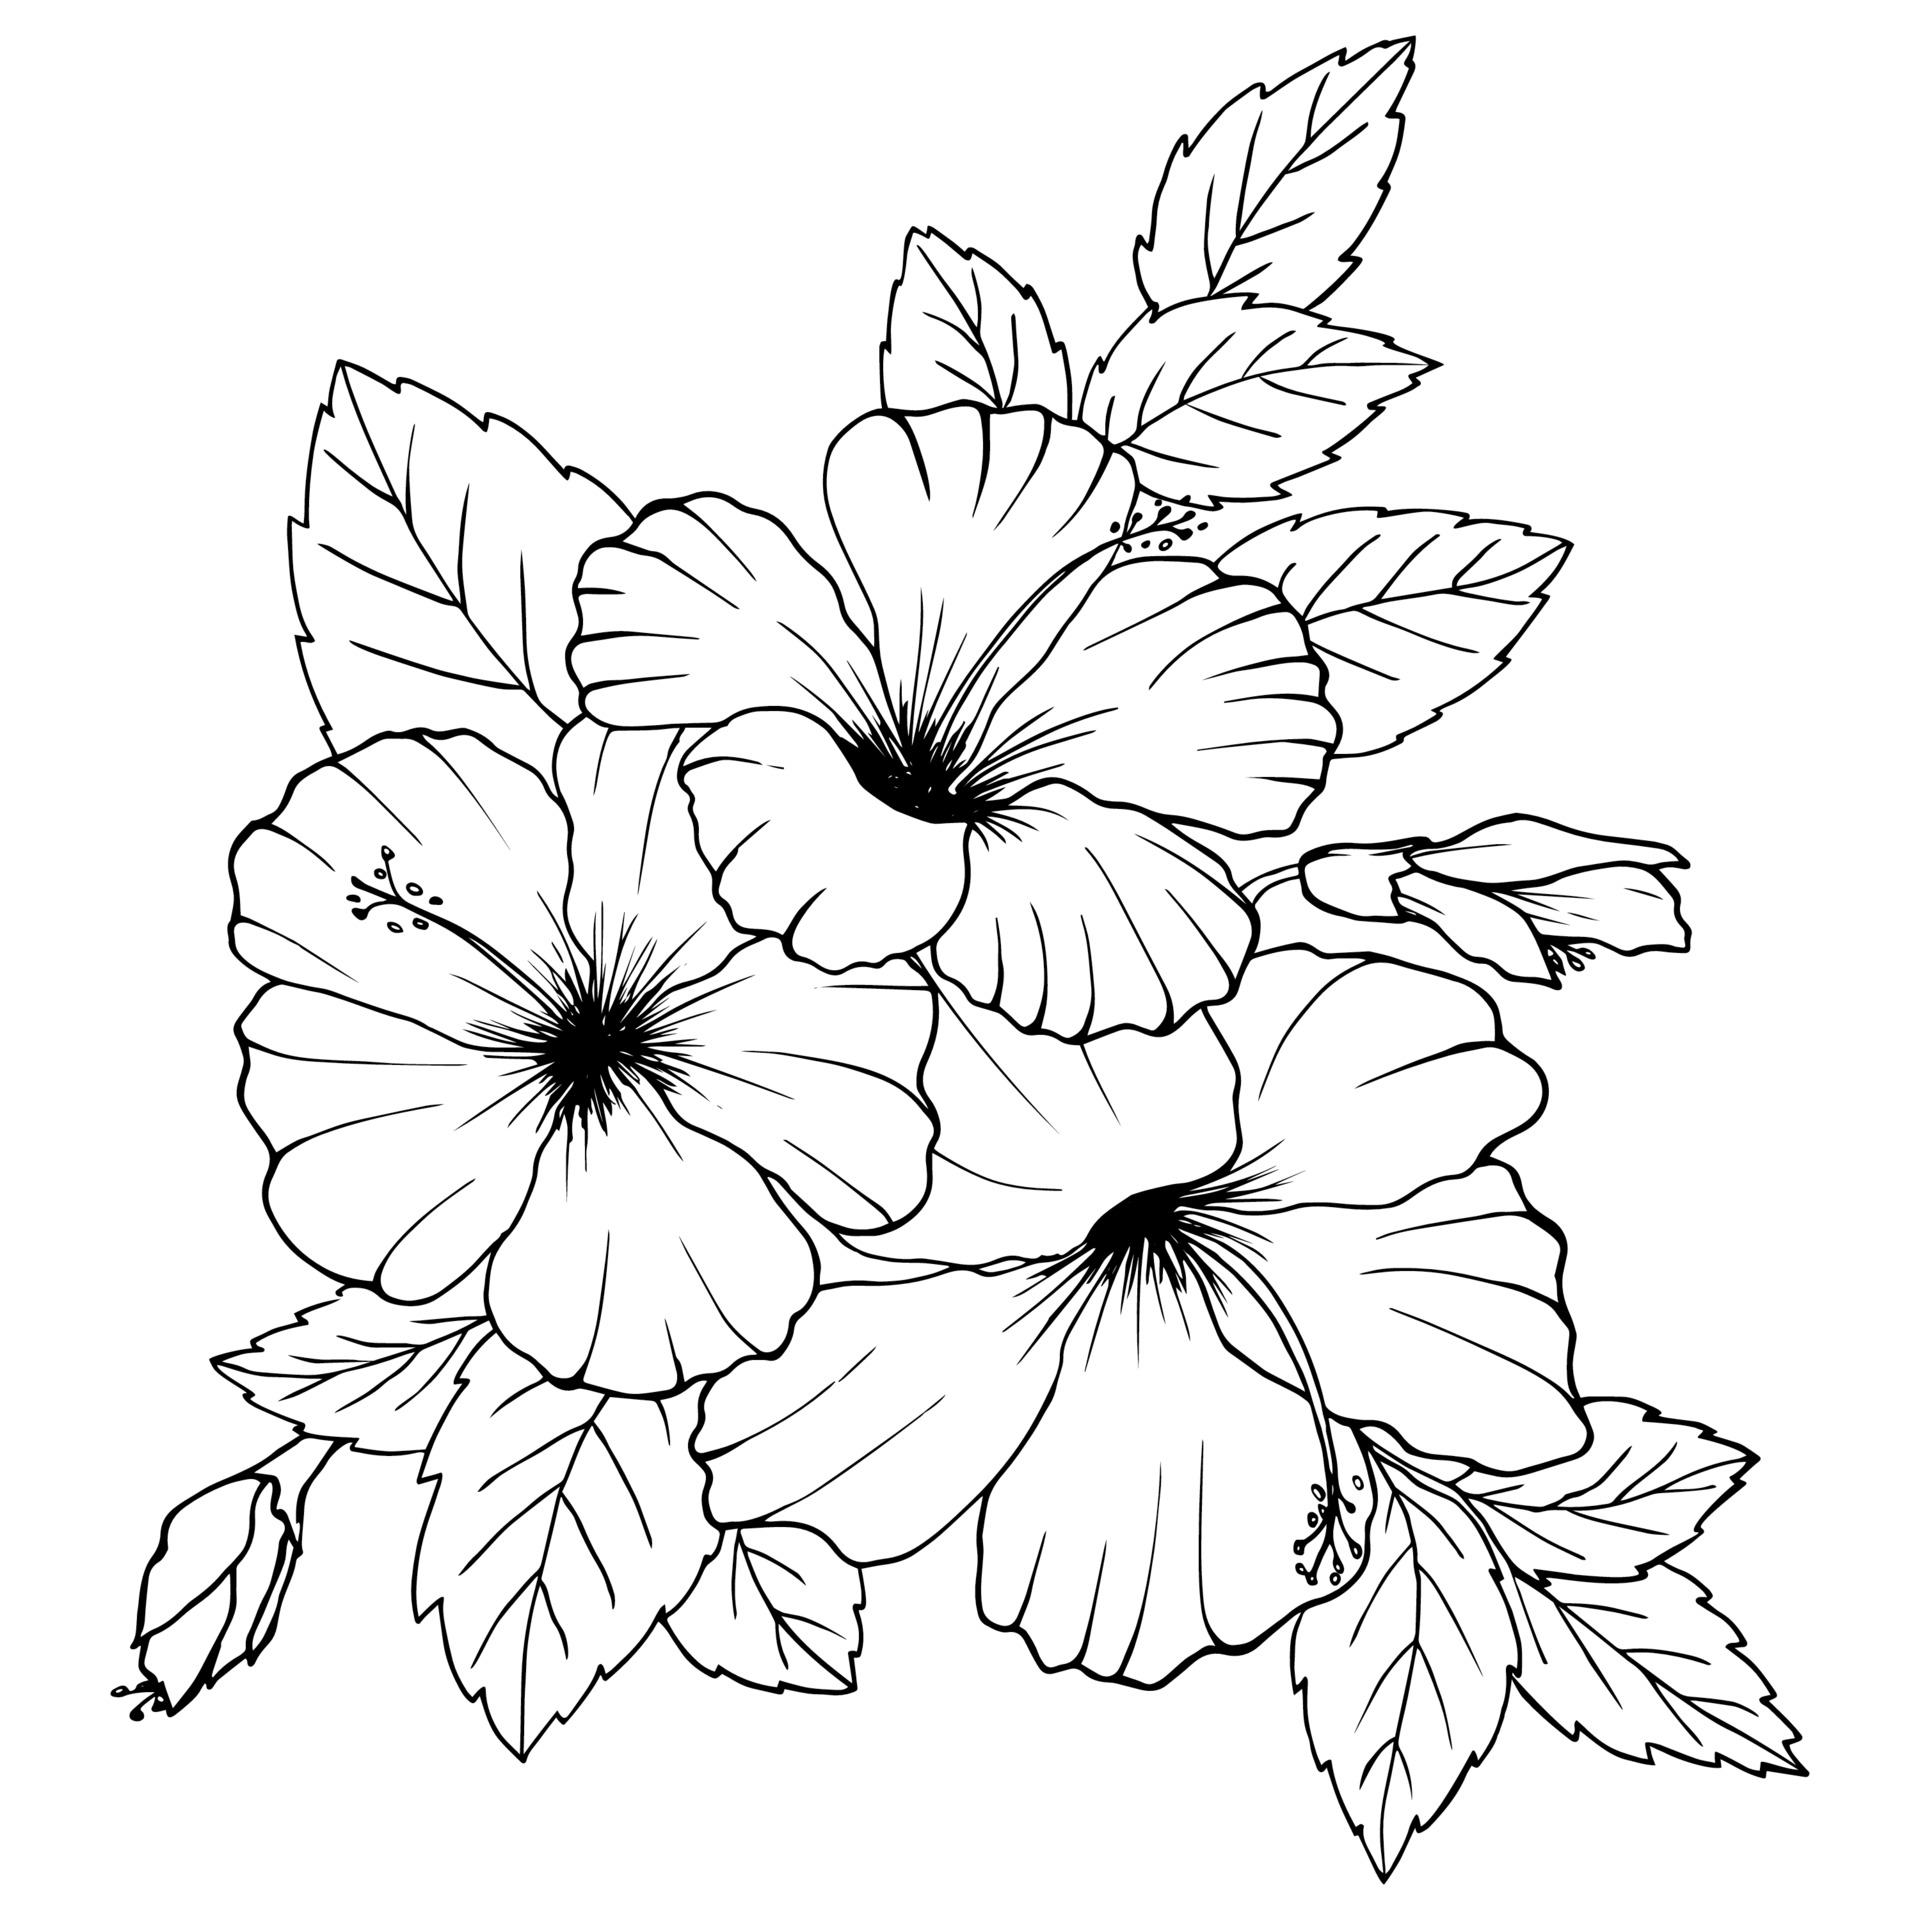
This guide will walk you through the process, showing you how to draw, outline, and even color a hibiscus flower. We'll show you how to create your own realistic hibiscus flower drawing, from the first drawing steps right up to the coloring process, so you will have a complete picture. It is a simple approach to drawing flowers that is fun and, you know, quite simple, too.
Table of Contents
- Why Draw a Hibiscus Flower?
- What You Will Need to Start Your Hibiscus Flower Drawing
- Getting Started: The Basic Shape
- Adding the Petals and Center
- Outlining Your Hibiscus Flower
- Bringing It to Life with Color
- Tips for a Realistic Hibiscus Flower Drawing
- Common Questions About Hibiscus Flower Drawing
- Your Next Art Adventure
Why Draw a Hibiscus Flower?
Hibiscus flowers are known for their large, beautiful petals and vibrant colors, you know, they really stand out. Learning how to draw a hibiscus flower is easy and fun if you follow our simple process, that is the honest truth. It is a great way to start if you are new to drawing, or if you just want to improve your skills, actually.
People often look for ways to express themselves creatively, and drawing flowers, especially those with such striking features, is quite popular, apparently. As we approach mid-2024, there is a consistent interest in learning new artistic skills, and this kind of drawing fits right in. It is a timeless activity, really, always bringing joy to those who try it.
A hibiscus flower drawing allows you to capture a bit of tropical beauty right on your paper. It is a chance to play with shapes and shades, and to really observe the world around you, which is pretty cool. Kids and beginners alike can now draw a great looking hibiscus, so everyone can join in the fun.
What You Will Need to Start Your Hibiscus Flower Drawing
You might think you need a lot of special things to start drawing, but that is not the case here, not at all. No fancy tools needed, just a pencil, some paper, and a little patience, which is rather nice. These are items you probably already have around your house, or they are very easy to get, so you can start right away.
A simple graphite pencil works perfectly for sketching the initial shapes. You might want a softer lead for shading later, like a 2B or 4B, but any pencil will do for the basic lines, you know. An eraser is also very helpful for fixing any little mistakes or for lightening lines, which happens quite often.
For coloring, you could use colored pencils, crayons, markers, or even watercolors. The choice is yours, really, depending on the look you want to achieve. Each medium gives a slightly different feel to your hibiscus flower drawing, so you can experiment a bit, too.
Getting Started: The Basic Shape
Learning how to draw a hibiscus flower starts with some very simple shapes, honestly. Think of it as building blocks, you know, one on top of the other. We will begin with a gentle curve for the stem and a basic oval or circle for the main part of the flower head, which is pretty straightforward.
First, lightly sketch a long, slightly curved line for the stem, that is a good first step. This line does not need to be perfect, just a guide for where your flower will sit. Then, near the top of that line, draw a medium-sized oval shape, which will be the general area for your petals, as a matter of fact.
This oval is just a placeholder, really, to help you figure out the overall size and placement of your hibiscus flower drawing. It helps to keep everything balanced and in proportion, which is kind of important for a pleasing picture. Remember to keep your lines very light at this stage, so you can easily erase them later.
Adding the Petals and Center
Now comes the fun part, adding the distinctive petals of your hibiscus flower, you know. Hibiscus flowers usually have five large, somewhat heart-shaped petals that spread out from the center. These petals are quite prominent, giving the flower its signature look, so you want to get them right.
From the oval you drew, start sketching out five petal shapes. They should overlap a bit and fan out, almost like a pinwheel, which is a good way to think about it. Make sure they are not all exactly the same size or shape; a little variation makes your hibiscus flower drawing look more natural, actually.
Next, draw a long, slender stamen that sticks out from the middle of the flower. This is the part with the little pollen dots on the end, you know, the anthers. It usually has a slight curve to it, and it is a very recognizable feature of the hibiscus, so do not forget it. Add a small, round shape at the very tip of this stamen for the stigma, which is kind of like a tiny button.
You can also add a few small, pointed leaves around the base of the flower or along the stem. These add a nice touch and make your hibiscus flower drawing feel more complete, you know. Just simple leaf shapes with a central vein will do the trick, really.
Outlining Your Hibiscus Flower
Once you are happy with your pencil sketch, it is time to make your hibiscus flower drawing really stand out, you know. This is where outlining comes in. You will use a slightly darker pencil or a fine-tip pen to go over your best lines, making them more permanent and clear, which is pretty neat.
Carefully trace over the petal edges, the stem, the stamen, and any leaves you added. Try to make your lines smooth and confident, but do not worry if they are not absolutely perfect; a little character is good, as a matter of fact. This step helps to define all the parts of your flower, so it looks crisp and finished.
After you have outlined everything, you can gently erase the lighter pencil lines from your initial sketch. This cleans up your hibiscus flower drawing and leaves you with a neat, clear picture ready for color, which is quite satisfying. It is a bit like magic, seeing your sketch turn into a proper drawing.
Bringing It to Life with Color
Color is where your hibiscus flower drawing truly comes alive, you know. Hibiscus flowers come in so many wonderful colors, like bright reds, sunny yellows, soft pinks, and even oranges. You can choose any color you like, which is pretty much up to you.
When you start coloring, think about where the light might be hitting your flower. Areas that are brighter will have lighter shades, and areas that are in shadow will have deeper, richer colors, which is a good way to approach it. This adds a sense of depth and realism to your drawing, so it looks less flat.
For example, if you are using colored pencils, you can press lighter for the highlights and harder for the shadows. You can also layer different colors to create new shades and textures, which is kind of cool. A little bit of green for the stem and leaves will make the flower pop even more, you know.
Remember, the goal is to have fun with it, really. Do not be afraid to experiment with different color combinations or techniques. Your hibiscus flower drawing is your own creation, and there is no single right way to color it, as a matter of fact.
Tips for a Realistic Hibiscus Flower Drawing
To make your hibiscus flower drawing look more real, there are a few simple things you can do, you know. These tips can really make a difference in how your finished piece appears. They help add that extra touch of natural beauty, which is rather nice.
- Observe Real Flowers: If you can, look at a real hibiscus flower, or even a good photo of one. Notice how the petals curve, how they overlap, and where the light falls. This observation helps your drawing feel more authentic, which is very helpful.
- Practice Shading: Shading adds depth and form. Practice making different levels of darkness with your pencil. Think about where shadows would naturally fall on the petals and around the stamen, so your flower looks three-dimensional.


Detail Author:
- Name : Loyal Sawayn MD
- Username : vwolff
- Email : ldouglas@hotmail.com
- Birthdate : 1983-01-10
- Address : 847 Hyatt Walk Liamouth, KS 51694
- Phone : +1 (682) 956-1800
- Company : Lind, Towne and Zboncak
- Job : Roofer
- Bio : Vel fuga vel culpa necessitatibus ut est animi. Adipisci saepe at perspiciatis ratione. Cumque quo adipisci praesentium aliquam.
Socials
linkedin:
- url : https://linkedin.com/in/johanna3658
- username : johanna3658
- bio : Exercitationem ullam rem vel nostrum enim.
- followers : 833
- following : 2009
facebook:
- url : https://facebook.com/jnienow
- username : jnienow
- bio : Qui consectetur unde veritatis eum est consequatur deleniti.
- followers : 6318
- following : 1456
instagram:
- url : https://instagram.com/johanna_official
- username : johanna_official
- bio : Ad ipsa ratione nihil sed sed iusto maiores. Maxime quisquam eum modi et distinctio inventore.
- followers : 3918
- following : 1215


 Bonus
Bonus