

Have you ever looked at a giraffe, with its long neck and interesting spots, and thought, "I would really like to try drawing that"? It’s a feeling many people share, you know, because these gentle giants are quite special. Getting started with drawing can sometimes feel a bit tricky, but honestly, capturing the look of this beautiful African animal is a lot more approachable than you might think. This guide is here to help you make that happen, offering a clear path to creating your own giraffe picture, which is pretty neat.
This post, as mentioned, offers free drawing lessons on how to draw a giraffe, a beautiful African animal that is loved by many. We’ll look at how to draw a giraffe easy for all ages, so whether you’re just starting out with art or you’ve done some drawing before, there’s something here for you. You will also learn a few different cartoonic giraffe drawing ideas, alongside ways to make those brown shapes look pretty realistic, which is a fun mix.
So, grab a piece of paper, a pencil, and get ready to have fun! By following the simple steps in this tutorial, you’ll be able to create a great looking giraffe, you see. This tutorial will walk you through the different steps to rendering the tall animal in pencil and pen, making it a nice activity for yourself or maybe even a fun Friday group activity, or keep it on hand for your fast finishers, that is a good idea too.
Table of Contents
- Why Draw a Giraffe?
- Getting Started: Your Art Supplies
- Basic Shapes: The Foundation of Your Giraffe
- Step-by-Step Guide: How to Draw a Giraffe (Classic Style)
- Exploring Other Giraffe Drawing Styles
- Tips for Drawing a Giraffe That Stands Out
- Common Questions About Drawing Giraffes
- Keep Drawing! Your Artistic Adventure
Why Draw a Giraffe?
Giraffes, you know, have this wonderful, unique shape that makes them really interesting to draw. Their tall stature and distinct spotted coats give artists a lot to work with, which is pretty cool. For kids and beginners step by step, drawing a giraffe can be a truly rewarding experience, offering a chance to learn about animal anatomy in a fun way, and that is a great thing. It’s also a way to connect with nature, even if you’re just putting pencil to paper at home.
Plus, there’s something about a giraffe that just makes people smile. They are, after all, a symbol of grace and calm, just a little bit. Learning how to draw a great looking giraffe gives you a skill you can use to make cards, decorate your room, or simply enjoy the creative process, so it’s quite versatile.
Getting Started: Your Art Supplies
Before we jump into the steps, it’s a good idea to gather your tools. You don't need anything fancy, you know, just some basic things. Here's what you'll want to have ready:
Paper: Any kind of paper will work, really. Printer paper, sketchbook paper, even a blank sheet from a notebook is fine. The main thing is that it gives you a surface to draw on.
Pencil: A regular graphite pencil is perfect for sketching. You might want one with an eraser attached, or a separate eraser, just in case you want to make changes. A softer lead pencil (like a 2B or 4B) can be good for darker lines, while a harder one (like an HB) is nice for lighter initial sketches, you know.
Eraser: Mistakes happen, and that is okay! A good eraser helps you clean up lines or remove parts you don't want. A kneaded eraser is a good choice if you have one, as it picks up graphite without damaging the paper, which is pretty handy.
Optional: Coloring tools: If you want to add some color to your giraffe, you could have colored pencils, crayons, or markers ready. This is where your giraffe really comes to life, you see, with those lovely brown spots.
Having these simple items ready means you can focus entirely on the drawing process, which is really what we want to do. It makes the whole experience a lot smoother, you know, when everything is at hand.
Basic Shapes: The Foundation of Your Giraffe
When it comes to draw a giraffe, it turns out that starting with simple shapes makes the whole thing much easier. Think of it like building blocks for your drawing, you know. These basic shapes help you get the proportions right before you add any details, and that is a smart way to go about it. We’re talking about ovals and rectangles, mostly.
Starting with the Head and Neck
To begin, you want to establish where the head will sit. Draw a large oval shape near the top of your paper, which will be the giraffe's head. It doesn’t need to be perfect, just a general guide, really. This oval is the starting point for everything above the neck, you know, like the ears and those little horns. You can make it slightly elongated if you want, to give it a more giraffe-like feel right from the start.
From this head oval, you’ll want to extend two long, curving lines downwards for the neck. Giraffes have incredibly long necks, so make sure these lines stretch down quite a bit, almost like two parallel roads going down the page. These lines should connect to where the body will be, which we will get to next, you see. Remember, the neck is a big part of what makes a giraffe look like a giraffe, so give it some good length.
Building the Body
For the main part of the giraffe’s body, you can draw a large, somewhat rectangular shape below the neck. It can be a bit rounded at the corners, kind of like a bean or a soft rectangle, you know. This shape will be the torso, the biggest part of the giraffe’s middle section. Connect the bottom of the neck lines to the top of this body shape, making sure the connection feels natural, so it doesn't look like a floating neck.
From the bottom of this body shape, you’ll extend lines for the legs. Giraffe legs are quite long and slender, so aim for that look. You can start with simple stick lines to get the placement right, and then you can thicken them up later, which is a good approach. Remember, the legs are a bit like tall stilts, giving the giraffe its impressive height, so make them long, you know.
Step-by-Step Guide: How to Draw a Giraffe (Classic Style)
This is a step by step tutorial that shows how to make those brown shapes look pretty realistic. By following the simple steps in this tutorial, you’ll be able to create a lovely giraffe drawing. We will go through it all, you see, from the very first lines to the final details.
Step 1: Oval Head and Long Neck
Start with that large oval shape near the top of your paper for the head. Make it a light sketch, you know, so you can easily erase if needed. From the bottom of this oval, draw two long, slightly curved lines going down to form the neck. These lines should not be perfectly straight; they should have a gentle curve to them, kind of like a soft bend. The neck should be quite wide at the bottom where it meets the body, and it narrows slightly as it goes up towards the head, that is how it tends to be.
Step 2: Body and Legs
Below the neck, draw a large, rounded rectangular shape for the body. This shape should be more horizontal than vertical, you know, giving the giraffe its substantial middle. Connect the neck lines smoothly to the front part of this body shape. Then, from the bottom of the body, draw four long, straight lines for the legs. These lines should extend downwards, reaching a good length. Giraffe legs are very long, almost like pillars, so give them plenty of height, you see. You can add small circles or ovals at the bottom of these lines to represent where the hooves will go, just a little guide.
Step 3: Adding Facial Features and Ears
Now, let's bring the head to life. On the oval head, draw a small circle for the muzzle area, which is where the nose and mouth will be. Just above this, place two small dots for the eyes, which are kind of expressive. Giraffe eyes are often on the sides of their heads, so place them a bit apart, you know. For the ears, draw two leaf-like shapes sticking out from the sides of the head, near the top. They are somewhat rounded at the tips, which is pretty characteristic. You can add a little curve inside the ear shapes to give them some depth, too, which is a nice touch.
Step 4: Horns (Ossicones) and Mane
Giraffes have these interesting horn-like structures called ossicones. They are not true horns, but rather cartilage covered with skin and hair, which is pretty unique. Draw two small, short cylinders or rounded bumps on top of the head, between the ears. They should be relatively short and rounded at the top, you see. Then, for the mane, draw a series of short, spiky lines running down the back of the neck, from just behind the head all the way to where the neck meets the body. This mane is usually short and stands upright, giving a bit of texture to the neck, that is how it looks.
Step 5: Tail and Hooves
For the tail, draw a long, thin line extending from the back of the giraffe’s body, curving downwards. At the very end of this line, draw a tuft of hair, kind of like a small paintbrush, which is how a giraffe’s tail ends. This tail helps them swat away insects, you know. For the hooves, go back to those circles or ovals you drew at the bottom of the legs. Shape them into proper hooves, which are somewhat blocky and rounded at the bottom. You can add a small line in the middle of each hoof to show the split, which is a detail that makes them look more real.
Step 6: The Giraffe's Unique Spots
This is where your giraffe truly becomes recognizable! Giraffe spots are not perfectly round or uniform; they are more like irregular, polygonal shapes, you know, kind of like puzzle pieces. Start by drawing various sized and shaped patches all over the body, neck, and even parts of the legs. Don't worry about making them all the same; the more varied they are, the more natural your giraffe will appear, which is pretty cool. You can fill these spots in with a light brown or orange color if you are using coloring tools, or simply shade them in with your pencil to make them stand out, that is a good way to do it.
Exploring Other Giraffe Drawing Styles
In this tutorial, you’ll learn how to draw a giraffe with seven ways for you to choose, so let’s talk about some different looks you can try, you know. Beyond the classic, somewhat realistic approach, there are other fun ways to draw these amazing animals. This can really help you explore your own style and find what you enjoy drawing the most, which is pretty important for an artist.
Drawing a Cartoon Giraffe
You will also learn a few different cartoonic giraffe drawing ideas, which are great for kids and those who like a simpler, more playful look. For a cartoon giraffe, you can exaggerate features, you see. Maybe make the eyes much bigger and rounder, or give the giraffe a really goofy smile. The neck can be super long and wobbly, or even shorter and thicker for a cute, stubby look. The spots can be perfect circles or hearts, which is kind of fun. Cartoon drawing is all about expressing personality and making things look friendly and appealing, so feel free to play around with shapes and sizes, that is really the point.
For example, you could draw the head as a simple circle, and the body as a very rounded rectangle. The legs might be just two lines with circles for feet. This simplified approach makes it very accessible, especially for younger artists or those just starting their drawing journey, you know. It’s about capturing the essence of a giraffe in a more whimsical way.
Making Your Giraffe Look More Realistic
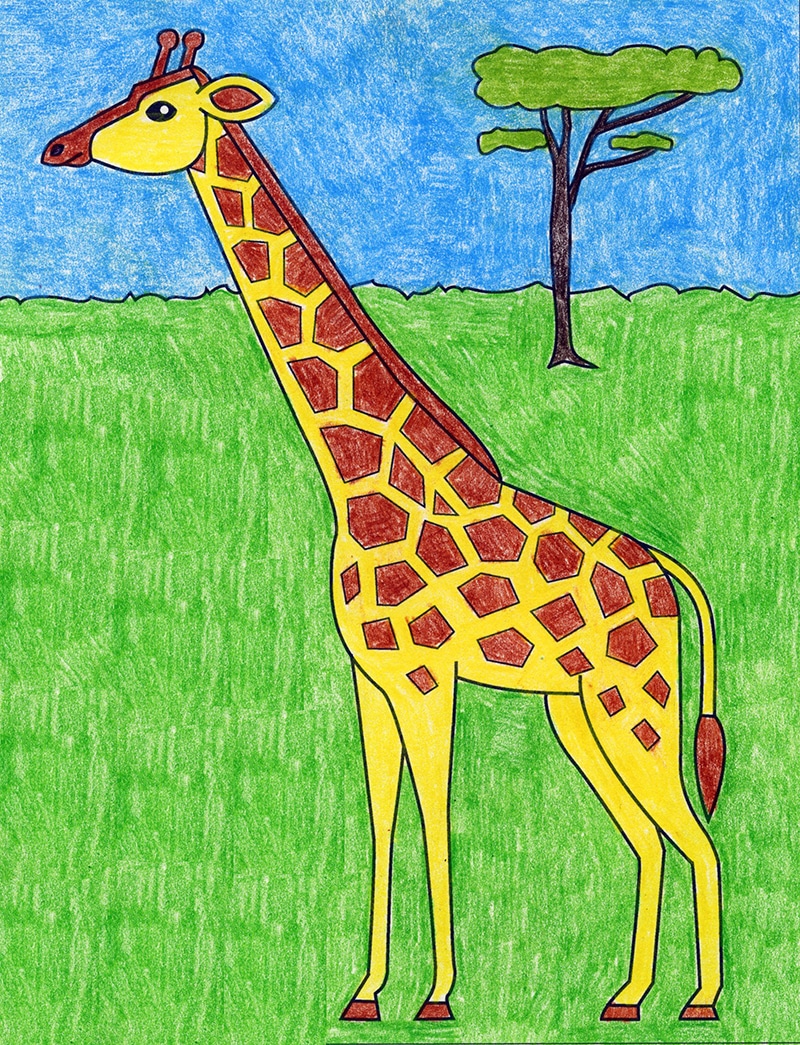
If you want to make your giraffe look more like a photograph, you’ll focus on adding more details and working with shading. A step by step tutorial shows how to make those brown shapes look pretty realistic, and it involves looking closely at how light falls on the giraffe’s body, you know. You would add subtle curves to the legs to show muscles and joints, and perhaps texture to the skin. The spots would have varied shades within them, and their edges might be softer, not just sharp lines. You would also pay attention to the way the mane and tail hair flows, which is a nice touch.
For realism, you might also consider the background, you see. Placing your giraffe in a savanna setting with some acacia trees can really bring the drawing to life. This level of detail takes more time, but it can be very rewarding if you enjoy capturing true-to-life images, that is what some people really like to do. Observing real giraffe photos is a great way to learn how light and shadow play on their forms, which is pretty helpful.
Tips for Drawing a Giraffe That Stands Out
Learning how to draw a giraffe easy for all ages means also picking up some good habits. Here are a few thoughts to help your giraffe drawings be even better, you know, and make them truly your own:
Use Light Lines First: Always start with very light pencil lines for your initial shapes. This way, if you need to adjust something, it’s easy to erase without leaving marks on your paper, which is pretty important. You can always go back and darken lines once you are happy with the form, you see.
Practice Proportions: Giraffes have very specific proportions – long necks, long legs, and a relatively compact body. Pay attention to how these parts relate to each other in size. You might even, you know, look at a few pictures of real giraffes to get a better feel for their unique shape, that is a good way to learn.
Vary Your Spots: As we talked about, giraffe spots are not all the same. Make them different sizes and shapes. Some can be big, some small, some rounder, some more angular. This variety makes your drawing look more natural and interesting, which is pretty cool.
Add Shading: Even with just a pencil, adding some shading can give your giraffe drawing more depth and make it look three-dimensional. Think about where the light would hit and where shadows would form, you know, like under the neck or on the underside of the body. This makes a big difference, really.
Don’t Be Afraid to Experiment: Try different angles, different expressions, or even different types of giraffes. There are several subspecies, each with slightly different spot patterns. This is your drawing, so make it unique to you, that is the best part of it. Maybe your giraffe is looking up at a tree, or perhaps it's bending down to drink water, you know.
Have Fun with It: The most important thing is to enjoy the process. Drawing should be a relaxing and creative activity. If a line isn't perfect, that is totally fine. It’s about the joy of creating something, you see, and that is what matters most.
Common Questions About Drawing Giraffes
People often have a few questions when they want to learn how to draw a giraffe, and that is totally normal. Here are some of the things people often wonder about:
How do I make the giraffe’s neck look long and graceful?
To make the neck look long and graceful, you know, you should start with two gentle, curving lines that extend quite far down from the head. Make sure these lines are not perfectly straight; a slight curve gives it a more natural, elegant feel. The neck should also widen a bit as it goes down to meet the body, which helps it connect smoothly. Think about the way a swan's neck curves, just a little bit, and apply that kind of flow.
What’s the easiest way to draw giraffe spots?
The easiest way to draw giraffe spots, you see, is to think of them as irregular puzzle pieces or broken shapes. Don't try to make them perfect circles or squares. Just draw a variety of random, blob-like shapes all over the body and neck. Some can touch, some can be separate. The more varied and imperfect they are, the more authentic your giraffe will look, which is pretty cool. You can even just draw outlines of shapes and then shade them in, that is a good approach.
Can I draw a giraffe with a pen instead of a pencil?
Yes, you can absolutely draw a giraffe with a pen instead of a pencil! This tutorial will walk you through the different steps to rendering the tall animal in pencil and pen. Drawing with a pen means you commit to your lines, which can be a fun challenge, you know. You can use different pen pressures to create lighter or darker lines, and cross-hatching or stippling for shading and texture. It’s a great way to practice confidence in your strokes, which is pretty helpful for any artist. Just remember you can't erase, so take your time with each line, that is important.
Keep Drawing! Your Artistic Adventure
By following the simple steps, you too can easily draw a perfect giraffe, and that is pretty exciting. Whether you are aiming for a realistic depiction or a fun cartoon version, the basic principles remain the same, you know. Starting with simple shapes and building up details makes the process manageable and enjoyable. This article is about how to draw a giraffe for kids and beginners step by step, making sure everyone can have a go at it.
Remember, every drawing is a chance to learn and grow your skills. The more you practice, the more comfortable you will become with your pencil and paper, which is pretty much how all skills work. Don't be afraid to experiment with different styles or add your own unique touches to your giraffe, you see. Maybe your giraffe has a flower behind its ear, or perhaps it's wearing a tiny hat, which could be really cute. The


Detail Author:
- Name : Matilda Yost
- Username : sauer.benny
- Email : antwan.mcdermott@stehr.com
- Birthdate : 1982-06-23
- Address : 87425 Howell Branch Apt. 677 West Theresa, AL 04555-7293
- Phone : 1-586-967-7093
- Company : Ernser, Cole and Kutch
- Job : Accountant
- Bio : Fuga impedit sit laudantium veritatis et. Veniam modi et odit aspernatur aut magnam. Facilis et veritatis error vero.
Socials
instagram:
- url : https://instagram.com/name853
- username : name853
- bio : Expedita quia architecto ratione sint. Placeat repellat et cum. Incidunt et vero odio.
- followers : 481
- following : 1322
facebook:
- url : https://facebook.com/name9238
- username : name9238
- bio : Ullam sint omnis eos facere dolores ut omnis.
- followers : 6928
- following : 218


 Bonus
Bonus